In this session will learn use of simple ListView.
Simple ListView means we will use built in list row or layout.
What is ListView
ListView is an Android control that repeat a specific layout in the form of row.
Create new project in eclipse (Android-First-Programm).
Click on res folder and then layout, now open required xml where you want to use ListView.
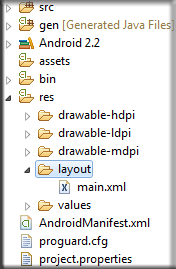
We can create any control like ListView using both layouts
1) Graphical Layout
2) Xml Layout
1) Using “Graphical Layout” Drag ListView from “Composite” tab.

Double click on ListView and set its properties in xml layout.
2) In Xml Layout write this code to create ListView.
<ListView
        android:id="@+id/listView1"
        android:layout_width="match_parent"
        android:layout_height="wrap_content" >
    </ListView>
Now by reference we can use ListView in code and can use its events like click event or long press event.
Open Activity (.java file) to use that ListView.
Activity is located in src folder -> package and choose activity where you want to use ListView.
To access ListView from xml layout we use its reference using this code.
ListView btn=(ListView) findViewById(R.id.listView1);
Using “findViewById();” we can access reference of any control like ListView from xml layout.
“listView1” is id of that ListView that we want to use and it must be exist in xml layout that we have assigned in “setContentView(R.layout.main);”. So complete code will be
<?xml version="1.0" encoding="utf-8"?>
<LinearLayout xmlns:android="http://schemas.android.com/apk/res/android"
    android:layout_width="fill_parent"
    android:layout_height="fill_parent"
    android:orientation="vertical" >

    <ListView
        android:id="@+id/listView1"
        android:layout_width="match_parent"
        android:layout_height="wrap_content" >
    </ListView>

</LinearLayout>
listView1 is exists in main layout. We can set reference of layout using “setContentView(R.layout.main);”
Button click event:
To set buttons click event use this code.
public class AndroidButtonActivity extends Activity {
    /** Called when the activity is first created. */
    @Override
    public void onCreate(Bundle savedInstanceState) {
        super.onCreate(savedInstanceState);
        setContentView(R.layout.main);

        Button btn=(Button) findViewById(R.id.button1);
        btn.setOnClickListener(new View.OnClickListener(){
            @Override
            public void onClick(View v) {
                // TODO Auto-generated method stub

            }
        });

    }
To check is button is clicked show message using Toast.
public class AndroidButtonActivity extends Activity {
    /** Called when the activity is first created. */
    Context mContext;
    @Override
    public void onCreate(Bundle savedInstanceState) {
        super.onCreate(savedInstanceState);
        setContentView(R.layout.main);

        mContext=this;

        Button btn=(Button) findViewById(R.id.button1);
        btn.setOnClickListener(new View.OnClickListener(){
            @Override
            public void onClick(View v) {
                // TODO Auto-generated method stub
                Toast.makeText(mContext, "button1 is clicked", Toast.LENGTH_SHORT).show();
            }
        });
    }
}
<Button
        android:id="@+id/button1"
        android:layout_width="wrap_content"
        android:layout_height="wrap_content"
        android:text="Button"
        android:onClick="button1Click"
         />
And define “button1Click” function in activity, without using button reference.
For your understanding I make two buttons and use button click events by two types.
See complete xml or java files.
Main.xml
<?xml version="1.0" encoding="utf-8"?>
<LinearLayout xmlns:android="http://schemas.android.com/apk/res/android"
    android:layout_width="fill_parent"
    android:layout_height="fill_parent"
    android:orientation="vertical" >

    <TextView
        android:layout_width="fill_parent"
        android:layout_height="wrap_content"
        android:text="@string/hello" />

    <Button
        android:id="@+id/button1"
        android:layout_width="wrap_content"
        android:layout_height="wrap_content"
        android:text="Button1" />

    <Button
        android:id="@+id/button2"
        android:layout_width="wrap_content"
        android:layout_height="wrap_content"
        android:onClick="button2Click"
        android:text="Button2" />

</LinearLayout>
AndroidButtonActivity.jave
package com.itPearl.androidButton;

import android.app.Activity;
import android.content.Context;
import android.os.Bundle;
import android.view.View;
import android.widget.Button;
import android.widget.Toast;

public class AndroidButtonActivity extends Activity {
    /** Called when the activity is first created. */
    Context mContext;
    @Override
    public void onCreate(Bundle savedInstanceState) {
        super.onCreate(savedInstanceState);
        setContentView(R.layout.main);

        mContext=this;

        Button btn=(Button) findViewById(R.id.button1);
        btn.setOnClickListener(new View.OnClickListener(){
            @Override
            public void onClick(View v) {
                // TODO Auto-generated method stub
                Toast.makeText(mContext, "button1 is clicked", Toast.LENGTH_SHORT).show();
            }
        });

    }

    public void button2Click(View view){
        Toast.makeText(mContext, "button2 is clicked", Toast.LENGTH_SHORT).show();
    }
}